Quickstart
Welcome to Kothar's Forge, our integrated environment for scientific computing! This page will introduce the essential concepts you need to begin running code. We will begin with a quick guide to the platform, then discuss our agent-based execution, and finally how to run your first aleph file.
The Platform
Upon your first login, you will find yourself within a web application called the workshop. On the left-hand side you will have your primary sidebar that has tabs for various parts of your workflow. The first tab is the file viewer, this is where you will manage your files and your projects. To make a new file click the new file icon in the upper left section.
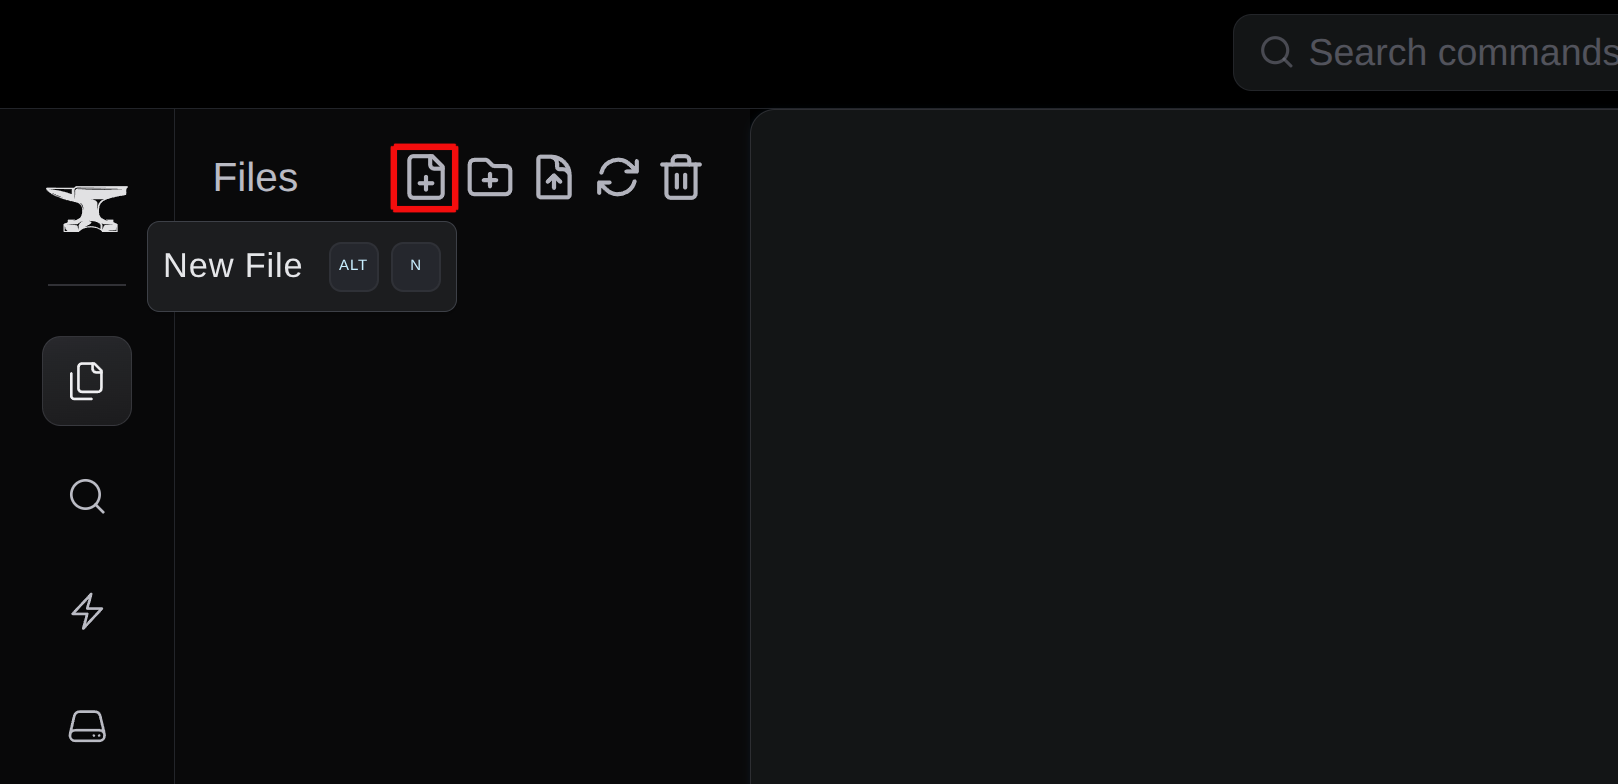
You will be prompted to name the file as well, let's call it welcome_to_aleph. Into the editor on the right of your new file type in:
print("Welcome to Aleph!")
You have written your first piece of aleph code and your file is ready for execution!
For a comprehensive guide to the rest of the workshop consult this page.
Agent-based Execution
In order to run files in the workshop, we use an agent to dispense the compute to local resources you have available using Docker. We have a guide that provides details on how to install Docker for different systems. Once the installation is done, go to the primary sidebar, click on the last icon, and click on the plus symbol in the agent menu to create an agent.
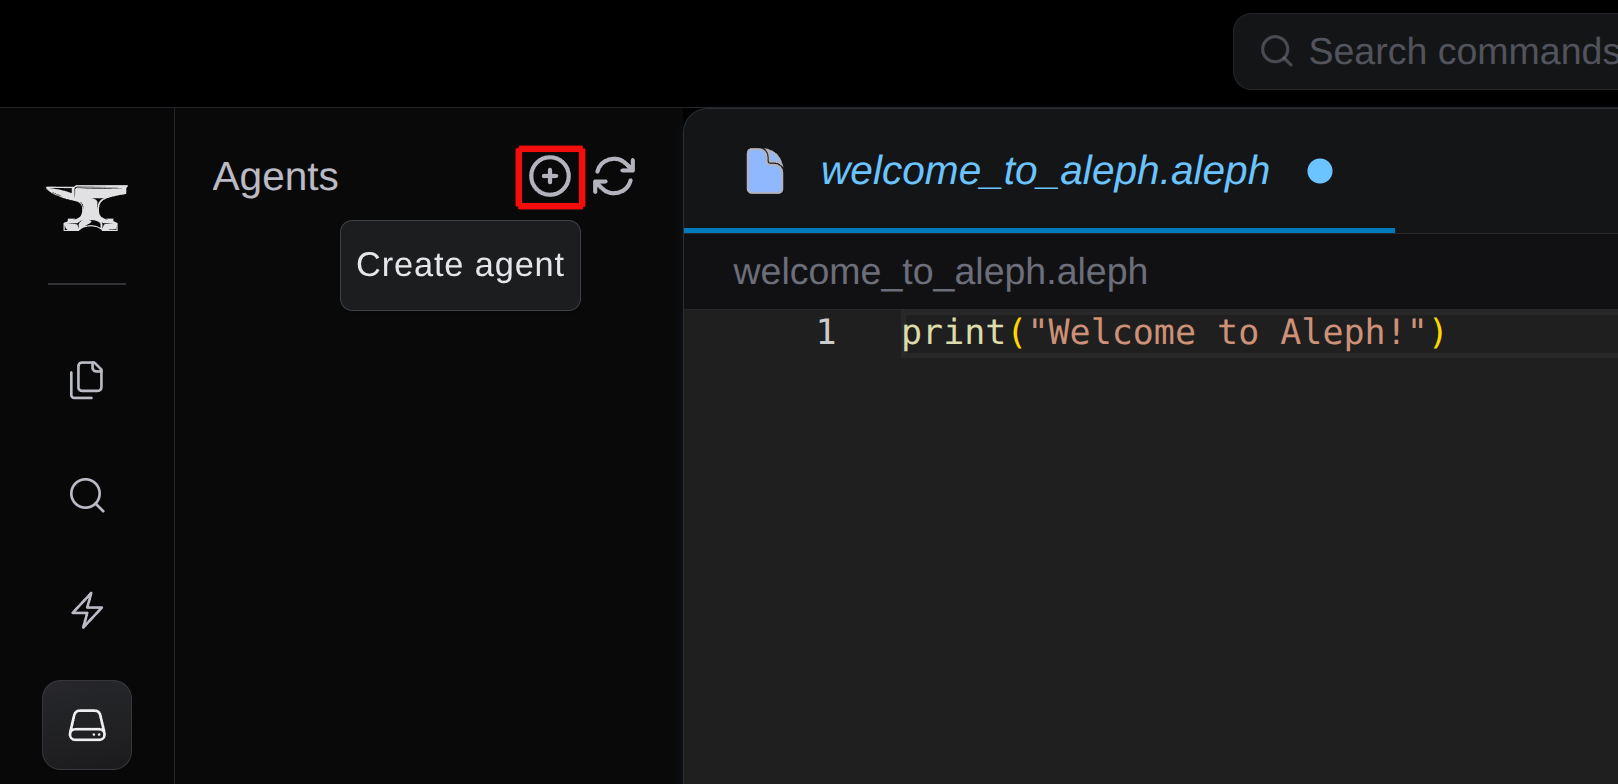 Give your agent a descriptive name, like the name of the resource it's running on (e.g. if it's an office workstation name it
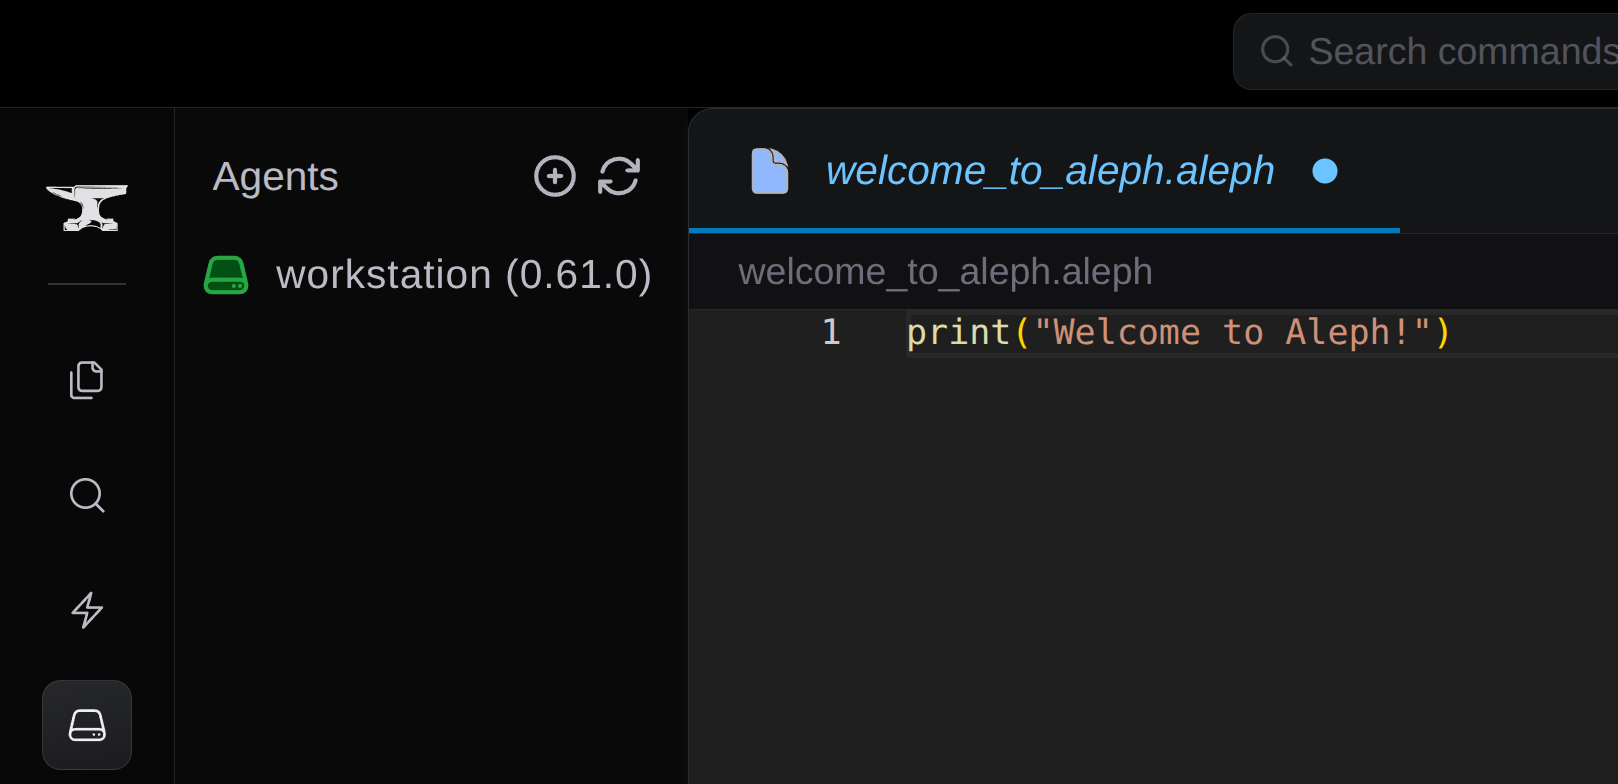
 workstation). Afterwards, a prompt will appear with instructions on how to install the agent onto this compute resource via Docker. All that is needed is to copy the Docker command into the appropriate terminal for your setup: through the Docker desktop UI or directly into the resources' terminal. After executing the command, the prompt will inform you when the agent has been successfully connected to the Forge. If the setup was done correctly, you should see the agent icon associated with your resource colored in green.
For more information about the agents consult the detailed agent documentation.
Running Aleph Files
Now that our agent is connected, we can execute the welcome_to_aleph.aleph file. Near the top-right of the workshop you can find a dropdown menu that lists the agents that can be used to run your file. The resource that has just been registered should appear with the same name that was entered during the setup. Pressing the play icon will execute the file immediately on the registered machine.

The output will appear near the bottom of the workshop in the output panel. Your first execution will take longer to run as it needs to download the Aleph runtime to execute the code (this will only occur when agents are first installed or updated). After a short wait, your output should read:
Welcome to Aleph!
If you want help understanding the file, changing the script, or diagnosing unexpected output, open Kai in the Workshop and ask it to use the current file or selected output as context.
Next Steps
Upon the output of the string above, your workshop environment is ready to go! Here are some next steps that can be taken to deepen your understanding of Aleph and the platform.
- Learn about the Aleph language by consulting the language reference.
- Read more introductory documentation in concepts.
- Work through the tutorials to begin working on problems you care about.